Speakers’ placement
The next two parts are about monitoring where you can read about the proper placement and calibration of speaker monitors, later on, I will share with you those tips and tricks which can be applied easily even in a home studio for the sake of proper acoustic dampening.
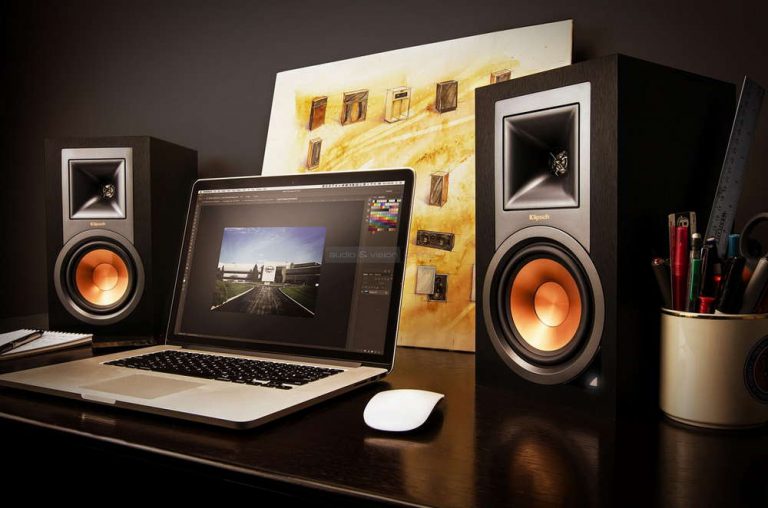
Proper speakers’ placement is essential for quality monitoring!
In most cases, monitoring issues are liable for bad mixing. Sadly, an acoustically designed room is not available for home studio owners like us nor are expensive acoustic panels, traps, and resonators. We can use only what is available. A small room and some coins in our pocket. Luckily, we can achieve quite good results by complying with some basic principles. If we comply with the golden rules of monitoring our work will sound great not only in our small studio but also elsewhere.
-

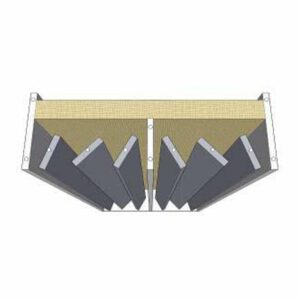
 Sound traps with diffuser- If a good look is important146 € – 155 € +Vat
 -
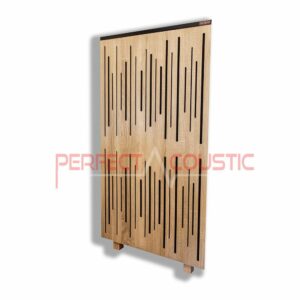
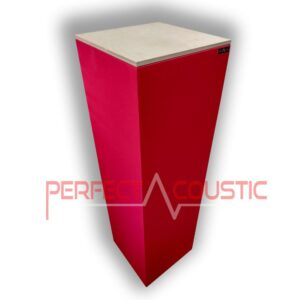
 Flexi acoustic panel with adjustable wooden slats194 € – 287 € +Vat


What was the previous part about?

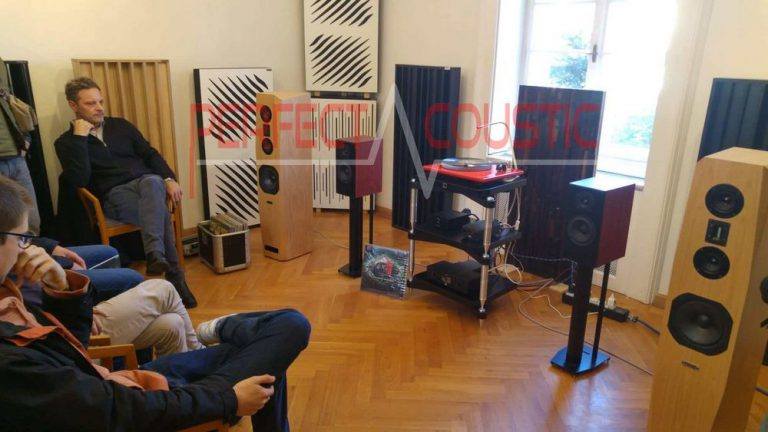
In the previous part (guerrilla acoustics) we have already learned that our listening chain consists not only of the speakers but rather the room and its acoustic properties: an optimal monitoring system can produce even sound pressure (volume) at all frequencies. To set-up, up such a system could take a lot of time! If someone is not willing to spend more than half an hour on this, he or she shouldn’t be surprised that the mix will not sound very nice. Home studio owners must keep the costs down therefore only time and effort can compensate for the less invested amount of money. By learning and experiencing we can make up an optimal monitoring system at a low cost!
First, let’s have an overview of the theory behind the rules of monitor placement and some formulas as a starting point. For those who wouldn’t like to be bothered with the calculations, there is a more practical solution for finding the proper speakers’ placement in the last quarter of this article
Proper monitor speaker placement in 7 steps:
1. Decide the initial listening position by using the 38 pct rule (i.e. where it is practical to sit during the work).
2. Define the distance between the loudspeaker and our ears (e.g. according to the manual or what is feasible in our room).
3. Set up the speakers at a suitable distance, orientation, and height.
4. Find the optimal distance of the speakers from the front and rear walls.
5. Apply acoustic panel or absorbing membranes.
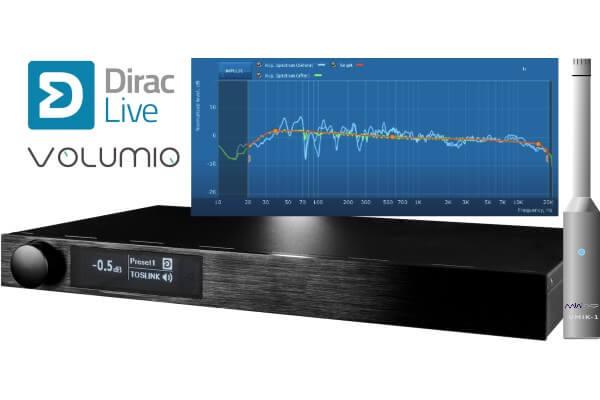
6. Optimization and fine-tuning by acoustic measurements. E.g.: Rew EQ.
7. Let’s rock and roll ….. it’s time to have some music at last.
Let’s see the theory in a little more detail.

Place the monitor speakers always on a stand. If you put them on a table or other piece of furniture or a hollow box then these will take over the vibration of the speaker box and act as a resonator which will significantly change the sound image. Therefore, always use any kind of vibration absorbing (insulating) solution. Do not save on this!!! One of the best solutions is if we have a stand the base or inside of which can be filled with sand. By using open cell foam under the monitors you can get better bass reproduction and better stereo image as the loudspeakers do not convey the vibration to the holding furniture.

The table stands usually perform this insulating function as well therefore their use makes it unnecessary to use additional foam.
What if we do not have a place or money for stands under the loudspeaker?
If we use neither stand nor foam, we can use Blu-Tack glue in all four corners of the speaker box to prevent the displacement of the monitors. This material can act as a kind of vibration-absorbing solution. It is advisable to lift the monitor speakers placed on the table not only for the reason of mechanical separation but can lessen thereby the comb-filter effect and the unfavorable early echoes as well. The foam and styrofoam do not provide a vibration insulating effect but the cardboard boxes and fiberglass or mineral wool sheets do.
-
Skyline diffusers 60x60x14cm118 € +Vat
-
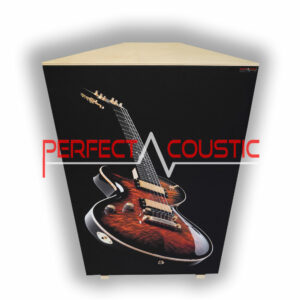
Decorative acoustic panels (corner bass)175 € +Vat


Do not heat the loudspeakers!
It may sound strange at first but do not put devices emitting heat under the loudspeakers. Such as amplifiers, external effects, etc. The heat rising from them moves the air and changes the sound.
If you decide to buy the product of IsoAcoustics you can quickly and easily learn with its calculator what type of vibration absorbing solution you need. You only have to choose the manufacturer and the type of your monitor from a list.

Use the monitor speakers always in their initial orientation. The standing monitors standing and the lying monitors lying! You can use the universal standing/lying monitors in any position but both loudspeakers should be in the same position. In the attached figure you can see that using a standing monitor lying on its side generates an undesired cut in the frequency range if we listen to it if we have mere degrees deviated from the acoustic centreline of the monitor.
How should we start?
The dimensions of our given room and the things there can determine where to place our monitors, but first of all, in the case of smaller rooms, it may be very helpful if we have the opportunity to locate our loudspeakers in front of the shorter wall. This way we will get a more balanced bass reproduction and thereby we can maximize the distance between our ears and the rear wall. If the surface of the rear wall is hard it should possibly be at least 3 meters from our ears otherwise acoustic dampening must be applied. Stay in front of the shorter wall of the room.
The 38 pct rule
First of all, this is not a rule but guidance created by the world-famous studio designer, Wes Lachot. It determines the optimal listening position in a rectangular room with proper acoustics. As every guide with ance, this is based on compromises as well and provides help only for the start. But it is enough to start the work by which we can make it perfect by fine-tuning at the end.
First, determine our monitoring position i.e. where it is advisable to sit.
Measure the length of the longer wall (H) and put the chair where you sit while working at 38% of it. You can calculate the position of the loudspeakers as follows: Length of the wall (H, in meters) x 0,38. Our ears must be at this distance from the opposite wall. If this is not possible for any reason then measure the 38% from the rear wall and put the chair there, although it is much better to sit closer to the opposite wall because the bass peaks develop in front of the loudspeakers due to the strong reflections. The worst possible case is that we sit in front of the rear wall (except if the rear wall has a very strong acoustic dampening).
-
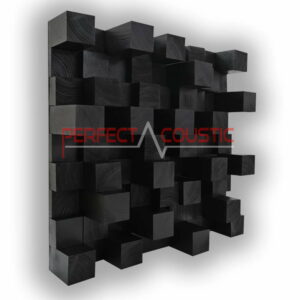
Cubic acoustic sound panels80 € – 109 € +Vat
-
Rustic-Vintage sound diffuser-Made of real pine65 € – 129 € +Vat


Acoustic diffuser on the rear wall

If we plan to mount an acoustic diffuser on the rear wall it is advisable to leave some space before it to allow the diffusing sound waves to spread. Of course, it depends on the type of diffuser as well. We have also an acoustic diffuser for near-field monitoring.
If you cannot place the monitoring position at the 38% line you should try lines of 35-43%. You should by no means sit in the longitudinal axis (50%) or at the quarter (25%) of the room as this is where first and second standing waves are generated.
In a perfect world, the 38 pct rule may provide the most balanced low-frequency, but as we are in the real world, after the initial positioning it is advisable to seek the most balanced monitoring position in our room. To do that, it is worthy to perform frequency response measurements e.g. with this free software: ROOM EQ WIZARD. SzG