room acoustics
The most famous guerrilla of the world was Che Guevara. He may be familiar for many for his characteristic portrait and his cap with the red star. Here in Europe, the word “partisan” is rather common thanks to those stories told about the glorious deeds of the heroic Soviet partisans.

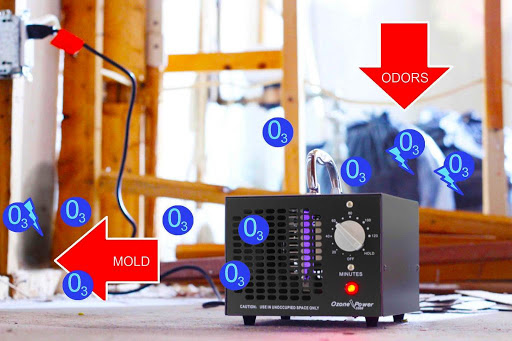
I don’t really know if Che Guevara was familiar with the issue of acoustic dampening of rooms – or to acoustic treatment to improve music quality – during his life, but I must confess that I simply photoshopped those speakers on the above picture. We can find the exact definition of the word “guerrilla” on the Internet, nevertheless, we also use this word for another phenomenon nowadays.
Such as the guerrilla gardeners, who fill the city with flowers and plants using their own simplistic methods under cover of darkness to flourish concrete jungles, we can apply the same method to eliminate our room acoustic issues. Of course, I do not mean by this that we should plant a lot of flowers into our studio.
Those who are not aware if they need acoustic dampening the first place, what is acoustic treatment and what it provides a solution for, please read this first:
-
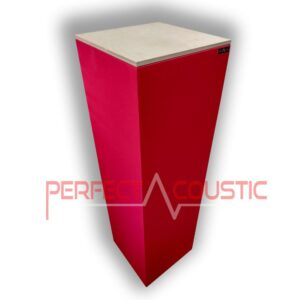
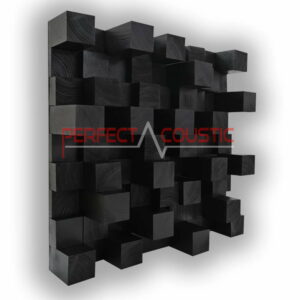
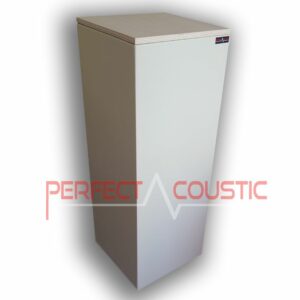
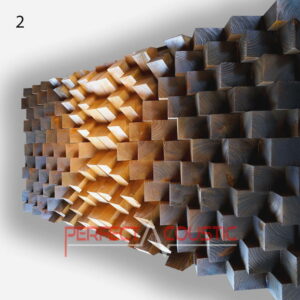
 Cubic acoustic sound panels80 € – 109 € +Vat
 -
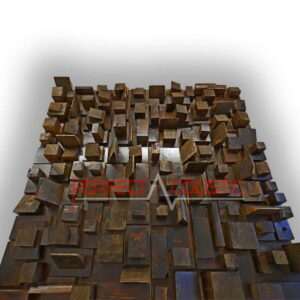
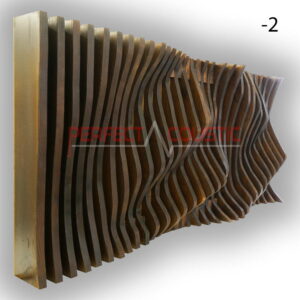
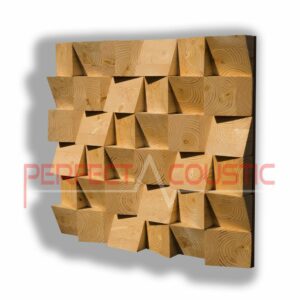
Rustic-Vintage sound diffuser-Made of real pine65 € – 129 € +Vat


We can approach room acoustics from the theoretical and practical point view.
In order to achieve a good result we need both of them since they are not mutually exclusive. “Guerrilla acoustics” prefers the practical approach, having said that you can read also about the reasons for this in the below article.
What you absolutely should know of the theory

We have two approaches to the problem of acoustics practically:
We have to solve the issues of low frequency sounds and those related to middle and high frequencies. In small rooms the sounds below 300 Hz are considered low frequencies, in this case the standing waves cause the problem. We consider the sounds above 300 Hz middle or high frequencies, and in this case the reflections are the problem. Basically, we can state that in a small room we hear the sound of the loudspeakers above 300 Hz, and the sound of the room below this level.
On the one hand, we can consider the middle/high frequencies as energies arranged like rays, such as light reflected from a surface without penetrating it. On the other hand, it is more appropriate to approach low frequencies as waves.

- Figure
particle velocity and sound pressure
sound pressure
particle velocity
size of the room
The sound is actually the motion of the air particles which results in a pressure on our eardrum.
When sound is emitted, the particles move freely in the air as so-called longitudinal waves. When a sound wave hits a hard surface that is acoustically impenetrable (e.g. the wall) the particles shrink, slow down and stop; they transmit their energy to the wall.
The surface will be deformed to some extent, and when it regains its original shape it returns the remaining energy to the particles, and the wave will continue in the opposite direction; in other words it is reflected.
The particles do not actually move in the direction where the wave is spreading, they only adopt its motion (see animated picture). When they hit a surface they create pressure on the surface and the condensation of the particles increases the air pressure also.
On Figure 2 you can see how the velocity of the particles and the value of the sound pressure changes in size in the room, taking optional directions. Due to standing waves, the pressure can be constant not only along the walls, but also at 1/2 and 1/4 of the room size depending on the frequency.
-
Skyline diffusers 60x60x14cm118 € +Vat
-
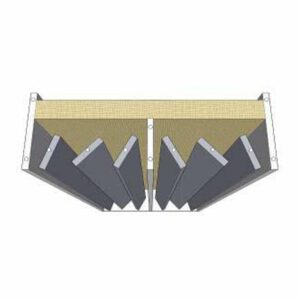
Decorative acoustic panels (corner bass)175 € +Vat


Why is it important for us to know this?
What is the guerrilla (room) acoustics?
Unfortunately, acoustics is a complex science, which requires not only widespread knowledge of physics and mathematics but also extensive knowledge of materials and even more experience. What we mere mortals can easily acquire from these is experience.
Briefly that means the following:
While we are listening to music (or sounds) in our studio our mate makes changes within the studio and we observe the effect of these changes on the sounding. If we feel that the music became more balanced, detailed, understandable, then the given changes are beneficial and worth keeping them. If we experience the exact opposite, then those changes were undesirable and must be avoided.
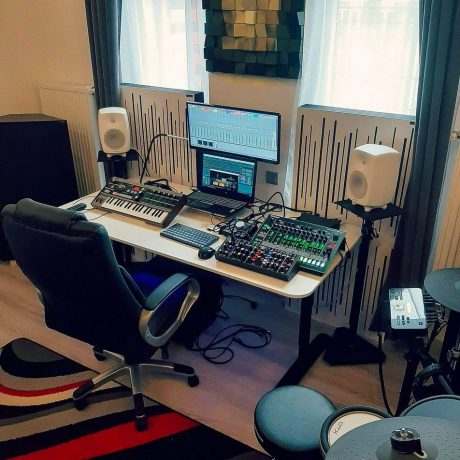
This is a room with inappropriate acoustic treatment.
acoustics")
Methods in a nutshell
As a preliminary summary, here are some simple methods, by which we can easily modify the acoustics of our rooms:
- Your mate holds a big (and if possible, a thick) pillow in his/her hand and moves it slowly along the wall of the room mainly in the ear level of the listener and in the corners. You will hear the change immediately.
- Thick curtains and carpets or soft seats and recliners can only worsen the situation as you only dampen the high frequencies by them.
- You may put a pillow on your desk or on the mixing board in front of you testing thereby the distortions due to the comb-filter effect.
- Books are made of paper, which is made of wood. Their specific gravity is 0,7-1,2 g/cm3, which is quite significant, thus they dampen well the velocity of the low frequency sound waves.
- Therefore, quasi a bass trap can be made of them. It is worth placing them mainly in the corners or before the front and rear walls. It is worth leaving an air gap of 10-20 cm between the wall and the dampening panels. Use the guerrilla method also for determining the optimal positioning.
-
 Sound traps with diffuser- If a good look is important146 € – 155 € +Vat
 -
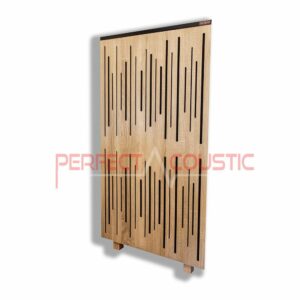
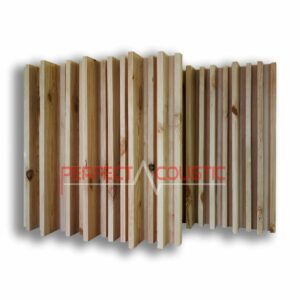
 Flexi acoustic panel with adjustable wooden slats194 € – 287 € +Vat


If you find the appropriate position, mark it in order to be able to put there an appropriate dampening unit or leave there the displaced item.
Of course, we use this method mainly for improving the acoustics of an existing room and in this case we can only talk about compromises. If you wish to have a room with perfect acoustics, it must be a room specially designed and built for studio purposes, and the scientific approach is useful even in the phase of planning.
Sensation
As we guerrillas do not have serious measuring equipment we have to rely mainly on our ears. (Or call Perfect Acoustic https://perfectacoustic.co.uk/acoustic-measurement/) Unfortunately this is not really a good thing as our hearing is highly subjective.
Our emotional state, fatigue and the acoustical circumstances we experienced before the testing highly influence our hearing. Furthermore, our hearing easily adapts to the circumstances. You can easily test it. Decrease the low frequency by 6dB on the EQ of your existing sound reproducing apparatus, and listen to the music on this setting for a while, e.g. for 10-20 minutes. After 20 minutes you will not sense the lesser bass; but if you restore then the EQ to 0dB you will immediately feel the change. Of course, you can do the same experience with the high frequencies as well. (Among other things this is why it is worth listening to reference music while mixing and have a rest of at least 10 minutes in every hour.)
In order to eliminate this phenomenon, it is worth applying methods that enable you to preclude the compensation-ability of your brain.

Microphones sense the frequencies in all cases objectively and constantly.
You can perform every necessary measurement with the free Room EQ Wizard software, only a measuring microphone is needed if possible. If you need an automatic correction software, you can find a lot on the Internet, the most popular may be IK Multimedia ARC-2 system. The free solution is provided by the MathAudio Room EQ VST/AU and Foobar2000 plugin. Visit for free download here: http://mathaudio.com/
Let’s see the details
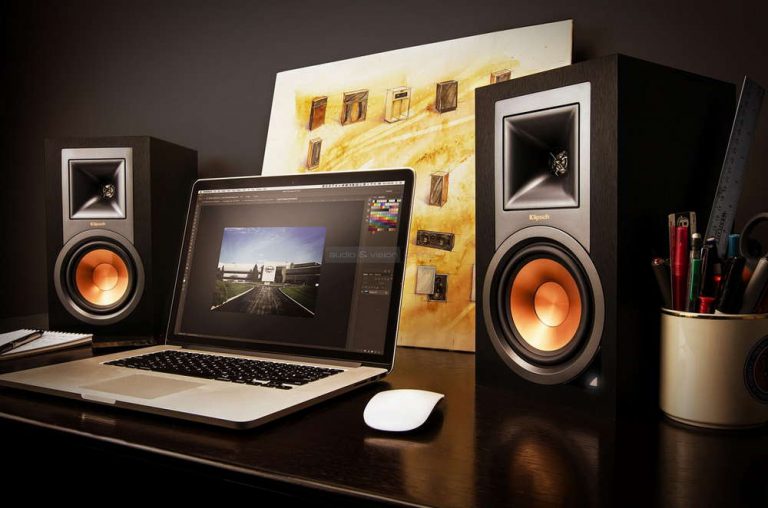
The listener room of your home studio already facilitates your task because you do not have to create proper sounding everywhere in the room. It is enough to get proper sounding at the place where you are sitting while mixing. That lifts the burden off your shoulders because it will be much easier.

As a first step observe what you have learnt about correct positioning of monitors and install them where it is optimal according thereto.
-
 Giga bass panel with membrane94 € – 129 € +Vat
 -
Striped Sound Diffuser 60x60x9cm108 € – 140 € +Vat


This is essential for the high-quality listening.
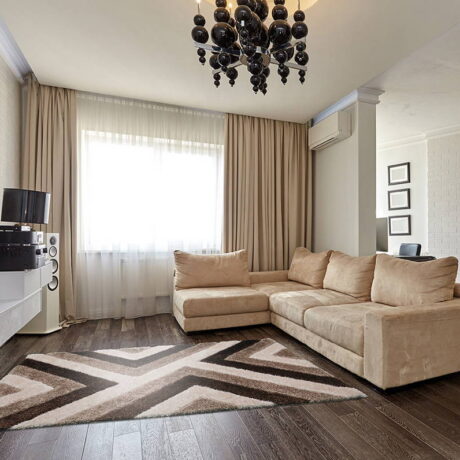
Although opinions vary, as it may also be appropriate to detach the monitors from their environment with some kind of vibration absorbing solution. Place the furniture, carpets and curtains in the room divided symmetrically on the right and left side if possible, in order to prevent the damage of the stereo image. (There’s no point treating acoustics issues in an empty room, especially if it will be furnished afterwards.)
You can use also the guerrilla method for that.
If the room has hard floor it is certainly very useful to put a carpet below your desk and chair as a first step. Keep the windows and doors closed meanwhile as they give additional space to the room affecting thereby the acoustics significantly.
If your room is very small (2×2 or smaller) and has doors that are positioned symmetrically compared to the room, you may try keeping the doors open as you increase thereby the size of the room, which is certainly beneficial in order to achieve better acoustics.
If you consider to achieve better results with closed doors you have to keep them closed only when you make valuable mixings. The nice look of the studio must be the least important aspect for a good sound engineer.
Dampening of the reflections

As our goal is to hear only the sound waves coming from the loudspeaker (green arrows) therefore the first and most important element of improving room acoustics is preventing early reflections and echoes (red arrows on the left side).
In case of a home studio, we can rather consider their dampening, and we can achieve excellent results by acting so. You can see on the picture that the dampening material placed to the adequate point (yellow rectangle on the right wall) absorbs the indirect sound waves and they are not reflected to our ear’s direction. (At least not to the same extent)
Primary reflections come not only from the side walls but from every surface.
If for example, the side wall is farther than the ceiling, the early echoes come sooner from there. Of course, they must be also dampened, but as the directional hearing is better horizontally than vertically, therefore, we first dampen the reflections from right and left sides.
Early reflections come also from our desk and from the mixing board, because these are located the closest to us and to the loudspeakers. We can avoid these only by appropriate positioning of the devices.
-
Wall Panel – Diffuser 140x70x8cm235 € – 271 € +Vat
-
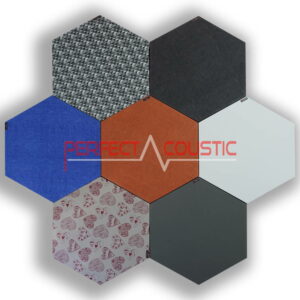
Hexagonal acoustic panel -Size: 60x60x6cm52 € – 61 € +Vat

Porous absorbing materials:
The acoustical problems on middle/high frequencies concern the reflections – as we already know – thus the speed of waves must be reduced here. We can manage this by diverting the particles in a way to hit the highest number of walls without suffering any changes of direction, such as the tubular formations that they must go through. Therefore, if we lead the sound in such a material, the particles moving among the fibres of the material and continuously hitting the fibres, will lose their kinetic energy, slow down then stop.
General sound absorbing capacity of the open cell acoustical foam:
10 cm thick, mounted directly on a hard wall effective at frequencies above 600Hz
5 cm thick mounted directly on a hard wall effective at frequencies above 1000Hz
The sound absorbing panels made by Perfect Acoustic are significantly more effective in beating the low frequencies than the light specific weight products offered by other producers. For example, a panel of 10 cm equipped with acoustic wool and placed 10 cm from the wall is almost equal to the dampening effect of an acoustics panel of 20 cm mounted directly on the wall.
The explanation of this phenomenon is that the sound waves going through the material hit the wall while coming out of the dampening panel on the back side. The waves are reflected from the wall and must go through the dampening panel again, thus the distance they traveled in the material doubles.
It is useful to know that the density of the liner material determines not only its absorbing but also its reflecting capacity.
The heavy and dense materials (70-90 kg/m3) absorb the lower frequencies well, but they reflect the higher frequencies. That is why the foam, styrofoam xps, etc. are incapable to dampen low frequencies.
The absorbing capacity in case of materials denser than 48 kg/m3 decreases toward the high frequencies.
It is important to know that the foam, curtain, carpet, etc. and the dampening panels made of thin, porous material will not function as bass traps, because much thicker thus heavier liner materials would be necessary to trap basses, which are impractical in small rooms indeed.
Furthermore, it is important to know that while these are acoustic insulating materials, we cannot significantly reduce the sound leaving or arriving to the room by their use. They are merely capable of reducing the amount of the reflected sound, therefore, we need to apply a different solution if we want to create an acoustic insulated room e.g. for undisrupted recordings.

I don’t want to build nor purchase a dampening unit…
Unfortunately we must accept that the bad acoustic environment will kill the music.
Finding the first reflection point:
-
Parametric Wall Art Panel (Diffuser)327 € – 426 € +Vat
-
Wood Acoustic Diffuser 60x60x6cm108 € – 140 € +Vat


We can calculate the first reflection point with this link, but we can determine it easily ourselves. Apply one of the popular guerrilla methods, the mirror trick!
Sit in front of the appropriately positioned and installed loudspeakers in the selected hearing position in order to be at the apex of the isosceles triangle composed of the loudspeakers and your head.
Your guerrilla mate places a mirror to the wall in the height of the loudspeaker and walks towards you while slipping it continuously on the wall.
The moment you perceive the loudspeaker in the mirror is the position of the first reflection. This applies to both loudspeakers.

Mark this point and put there a medium size absorbing panel. 1x1m is more than enough, we do not need longer distance. If you have smaller space than that, the centre of the panel should be at the same level as your ears and coincide with the marked point. Apply the same for the wall on the other side!
You can watch this process on video, in RODE Microphones’s series Studio Rescue.
")
Early echoes may come not only from the side walls but also from the rear wall and the ceiling.
Beside the first reflections generated on the side walls, you should dampen the part of the ceiling above your head as well. You can use the same dampening solution for ceiling as we did for the side walls.
Basically, you place the dampening panel above your head and its centre must coincide with the centre of your head. If your panel is not big enough you should move the smaller panel to the point where the best sounding is achieved – applying the guerrilla method.
As in the case of side wall panels, the same rule is true here: you should not fix the panel directly to the ceiling, but leave at least a 10-20 cm air gap between the dampening panels and the ceiling. If you fix a dampening panel of 20 cm or thicker on the ceiling then it is advisable to install it diagonally in the corner as you will somewhat dampen also the lower frequencies as well. Be careful to fix the units installed on the ceiling properly to avoid that they fall on your head or on the devices!
You should follow the same well-known methods on the rear wall as well.
If only a limited number of dampening panels is available, install them in line with the loudspeakers in the level of your ears on both right and left sides. If you have enough number of panels you may cover even the whole rear wall.
Be careful not to dampen all the walls in the room 100% because you will receive a room with dull, box-like sound.
Install just the number of dampening panels that reduces the defects! If you receive too dull sounding try placing the dampening units asymmetrically on the opposing walls. That means that if there is a dampening panel on one side, do not put any on the other side, opposite to that! Accordingly, rather use panels with smaller surface.
Acoustic diffusers
")
Beside the absorption of sound waves the other possible element improving acoustics is the so-called acoustic diffuser. It does not absorb but scatter the smashing strong sound waves to several tiny weaker parts. We mainly use them if we want to give the illusion of a bigger room compared to our existing room.
We can add some AIR, so-called airiness, to our otherwise small room by using it. Only imagination limits the home-made acoustic diffusers, having said that it is important to know that you must perform accurate calculations in order to achieve the perfect solution as the improper scattering rather worsen the acoustics of a room.
These improper scatterings exist in all average home studios thus do not think that an incorrectly planned and measured acoustic diffuser will work as a miracle when installed there! It is good to know that a true diffuser can only perform its blessing properly – that is, to create a true diffuser space – if all of the following conditions are met before installation:
-
 Bass acoustic wall panels with double leather membrane83 € – 260 € +Vat
 -
 3D acoustic diffuser 70x70x10cm122 € – 139 € +Vat

It is useful to know that a real diffuser can do its best properly
– i.e. creating a real diffuse space – only if each of the following conditions are met before the installation:
- Linear frequency response (+/- 2dB difference)
- Reverberation time is almost the same in the entire bandwidth
- Reverberation time is the same in every part of the room
- Reflections are the same in every part of the room
The 99,9% of the average rooms in homes meet these criteria only after installing acoustic dampening of proper quantity and quality.
")
The efficient functioning of diffusers does not require a space of sufficient size.
Accordingly, in the listening room of audio studios it is mainly used on the rear wall opposite of or between the loudspeakers. With them you hear as if the room was bigger than it is actually. Your desk or mixing board can also function as a diffuser therefore we test them with a foam, duvet or pillow put on them. You can exclude the reflecting sounds and thus the comb-filter effect.
If you hear a detailed and less distorted sound this time, you must must do something also in these points. In most of the cases this is only possible by changing the position of the devices as nobody wants to cover his/her mixing board with foam.
To be continued…
G.H.